


– FAQs
– FAQs
Select a topic
– Frequently asked questions: All
Where do I find information about the Hitachi Cooling & Heating brand?
The best place to go is our Newsroom.
Where can I view or download a catalogue of the different products you offer and their technical details?
You can check our dedicated Downloads section where you will be able to search and download catalogues, brochures and technical data about the products we offer.
Who do I contact if I have an issue with a Hitachi HVAC product?
Vist our Contact Us page and fill in the simple form so that we can ensure that your request is directed to the correct team.
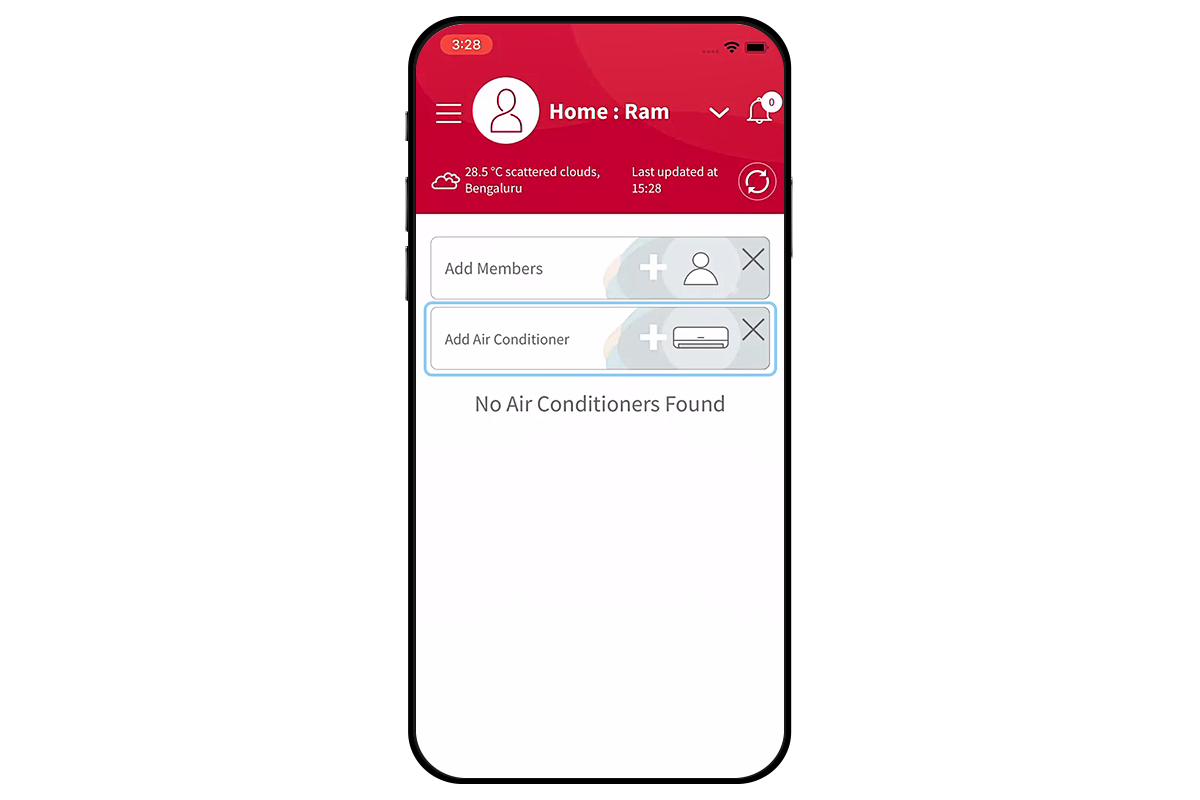
How do I pair my AC (built-in WiFi) with airCloud Go?
Step 1 - Navigate to the AC pairing page
Make sure that the air conditioner is ready to be Powered On. Open ‘airCloud Go’ app, log in and follow the steps below to add your air conditioner.
Tap “Add Air Conditioner” on the Home screen.
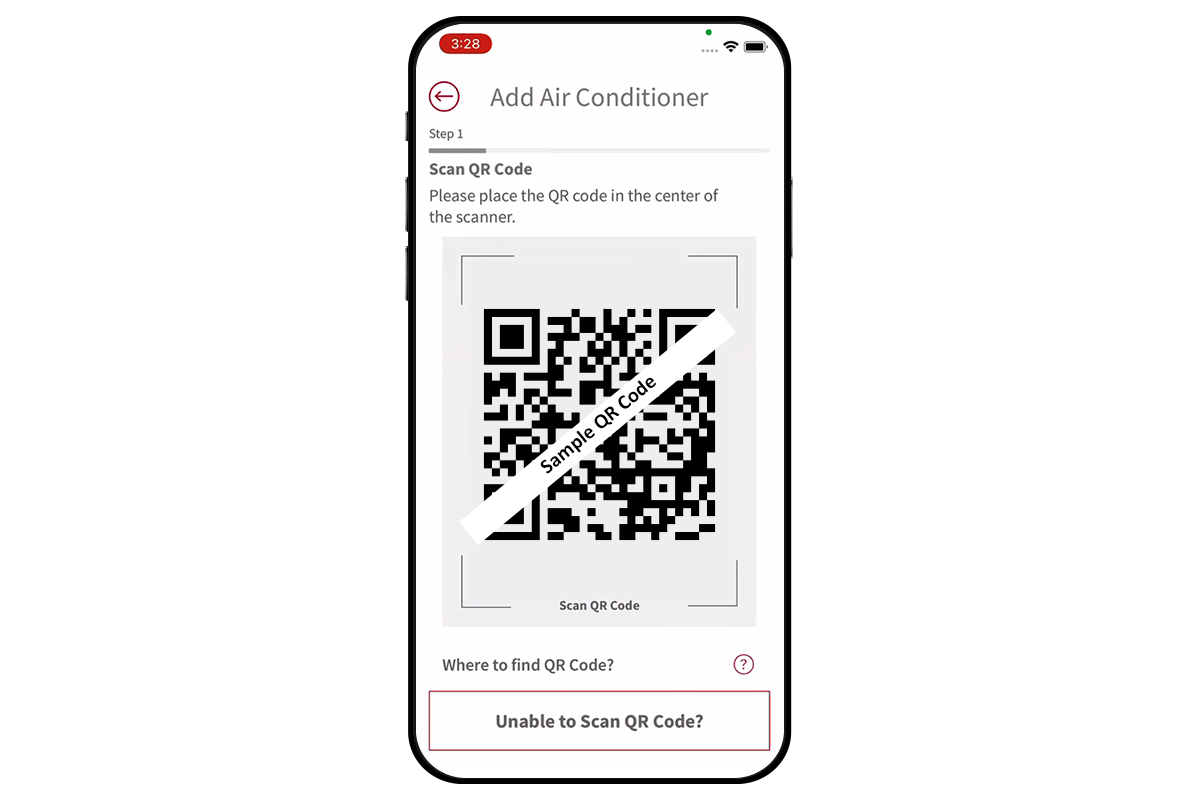
Step 2 - Scan QR Code
Scan the QR code on the bundled SSID & KEY label in the user manual or by lifting the front panel of your air conditioner.

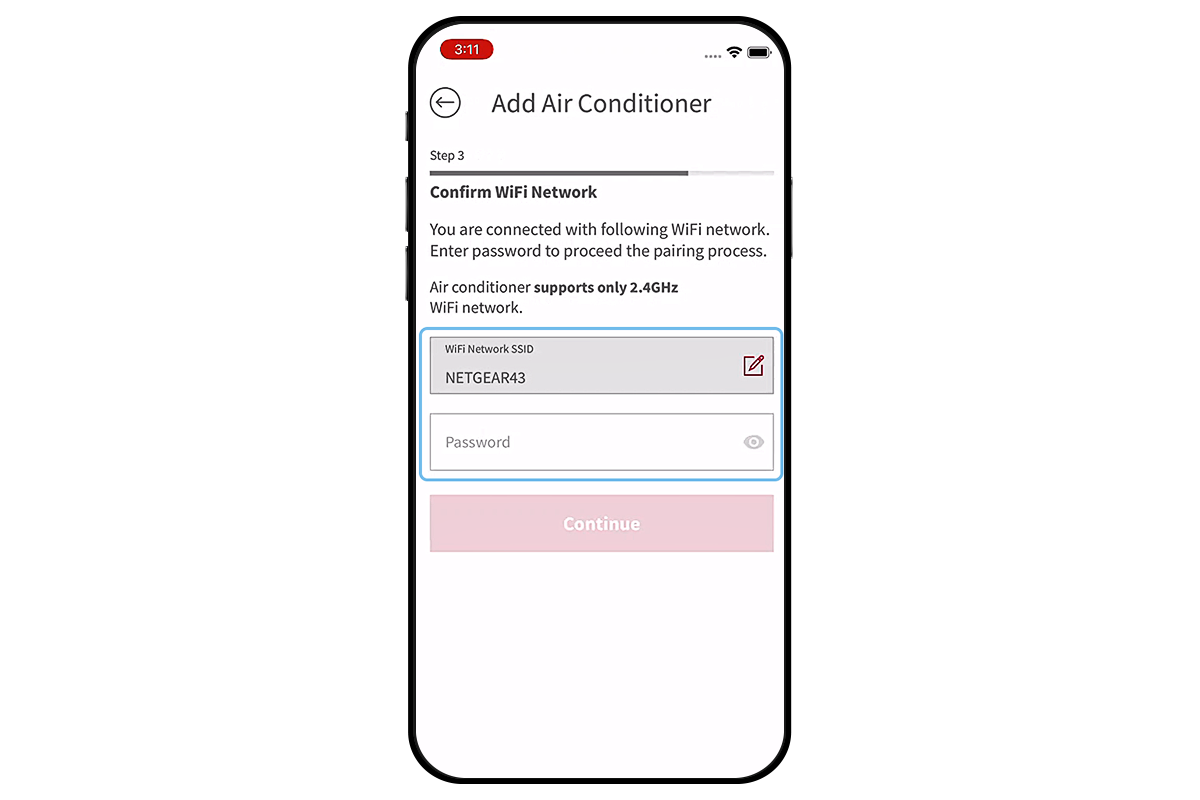
Step 3 - Confirm WiFi network
If the Wireless Network shown on the App is your home router, enter your home router password, tap ‘Continue’.
Otherwise, select the Edit button to change Wireless Network
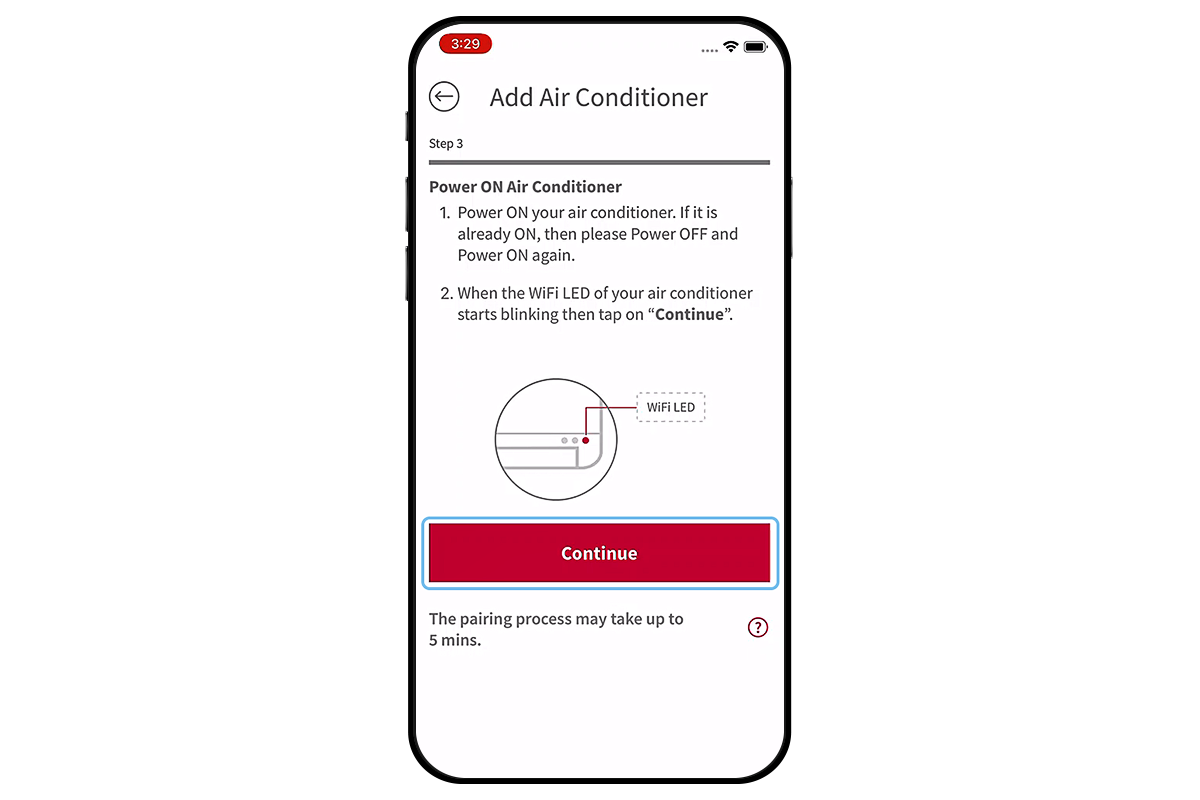
Step 4 - Power ON the AC to begin pairing
Make sure your air conditioner is powered OFF (electrical plug disconnected). Power ON your air conditioner, it will enter the pairing mode for 10 minutes and the WiFi LED will start blinking. Tap ‘Continue’.
Note 1: WiFi module can be reset with the remote control. In this case, the pairing mode can be entered without restarting the air conditioner by pressing the "Mode key" and "ON Timer key" simultaneously on the remote controller.
Note 2: If communication cannot be established within 5 minutes, please follow the instructions of the App to retry the pairing process.
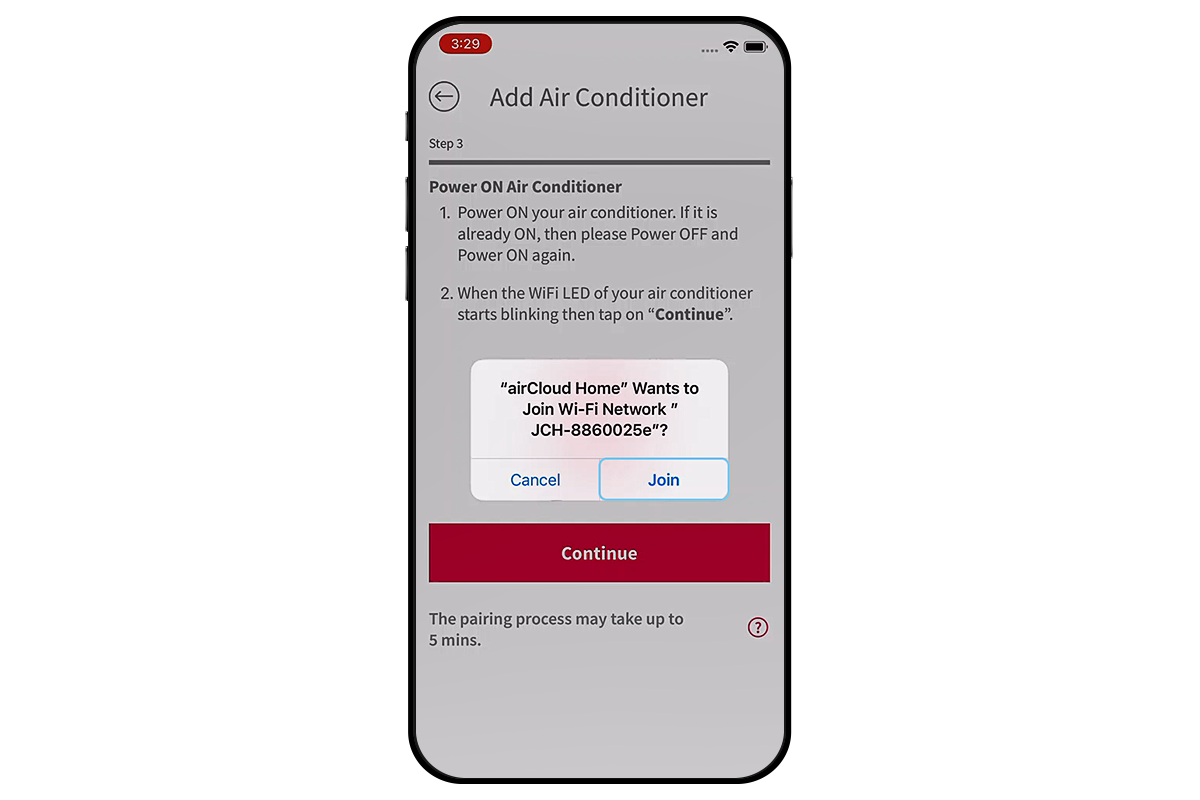
Step 5 - Connect app to WiFi network
The app will request to join the air conditioner’s WiFi network. Tap ‘Join’ to continue.
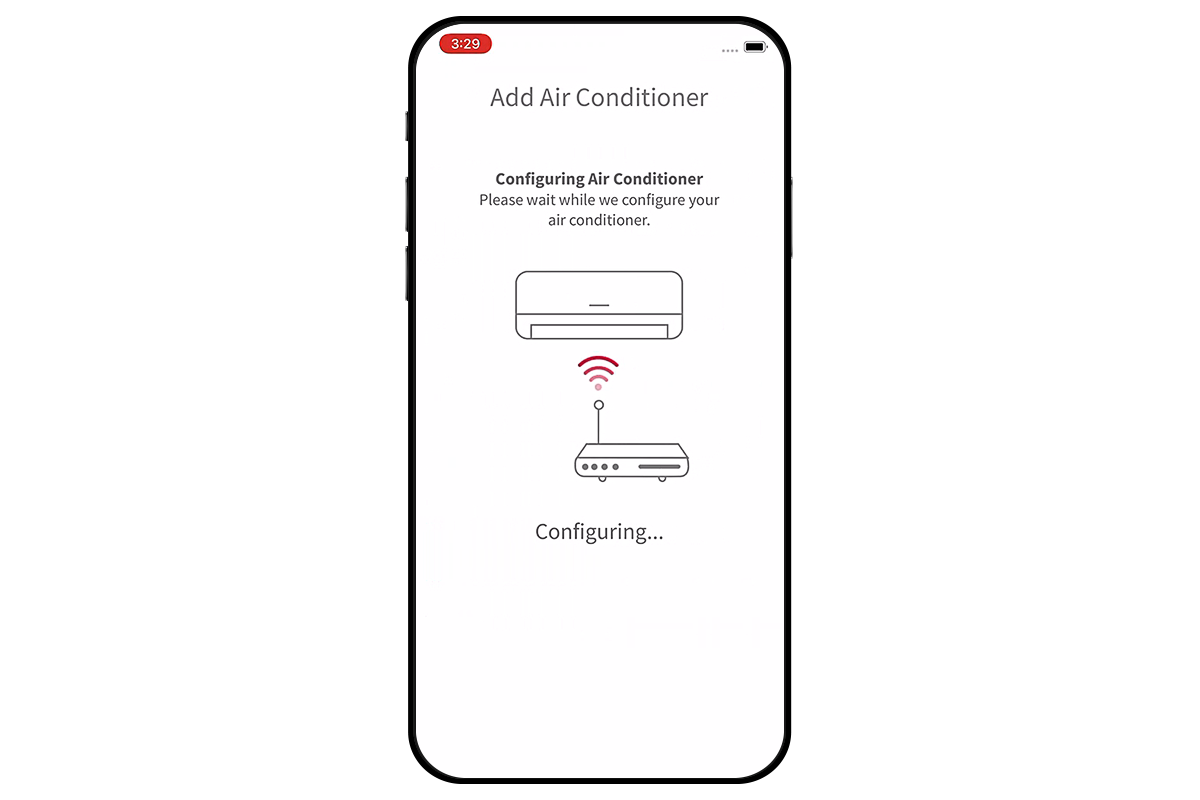
Step 6 - Connect AC to WiFi network
After connection with air conditioner is established, the network configuration will be pushed and air conditioner will try to connect to your home router. Once communication is established, WiFi LED on panel will be continuously ON after blinking.
After that airCloud Go app will reconnect to your home network.
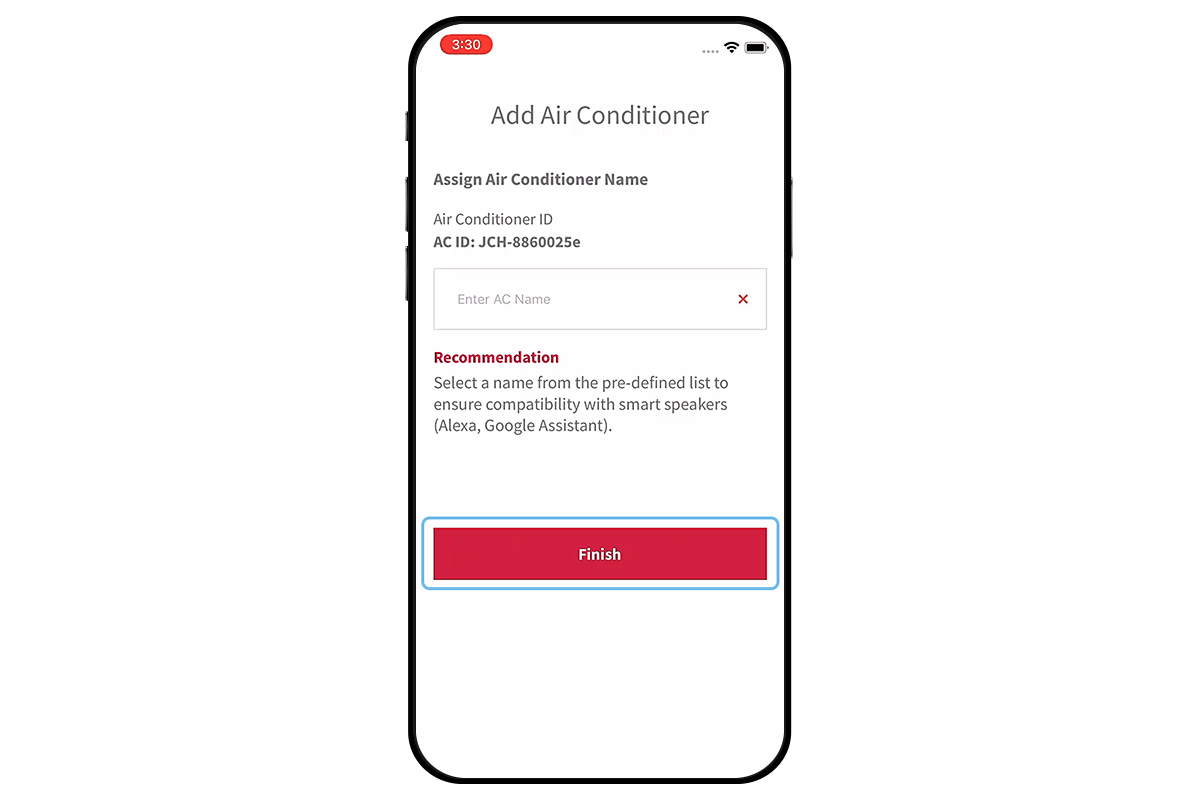
Step 7 - Name your AC
Please assign a name to your newly registered air conditioner. You may select a name from the pre-defined list or enter another unique name.
Names that are difficult to pronounce may have limited support by Alexa and Google smart speakers.
Upon completion tap ‘Finish’.
Step 8 - Set-up complete
If configuration has been successful, you will receive confirmation.
Once the air conditioner is added, the air conditioner may go offline temporarily to perform firmware updates.

Test question
test question here
How do I pair my AC to airCloud using an external adapter?
Step 1 - Navigate to the AC pairing page
Make sure that the Adapter is properly installed, and the air conditioner is plugged in. Open ‘airCloud Go’ app, log in and follow the steps below to add your air conditioner.
Tap “Add Air Conditioner” on the Home screen.

Step 2 - Scan QR code
Scan QR code on the bundled SSID & KEY label in the user manual or by lifting the front panel of your air conditioner.
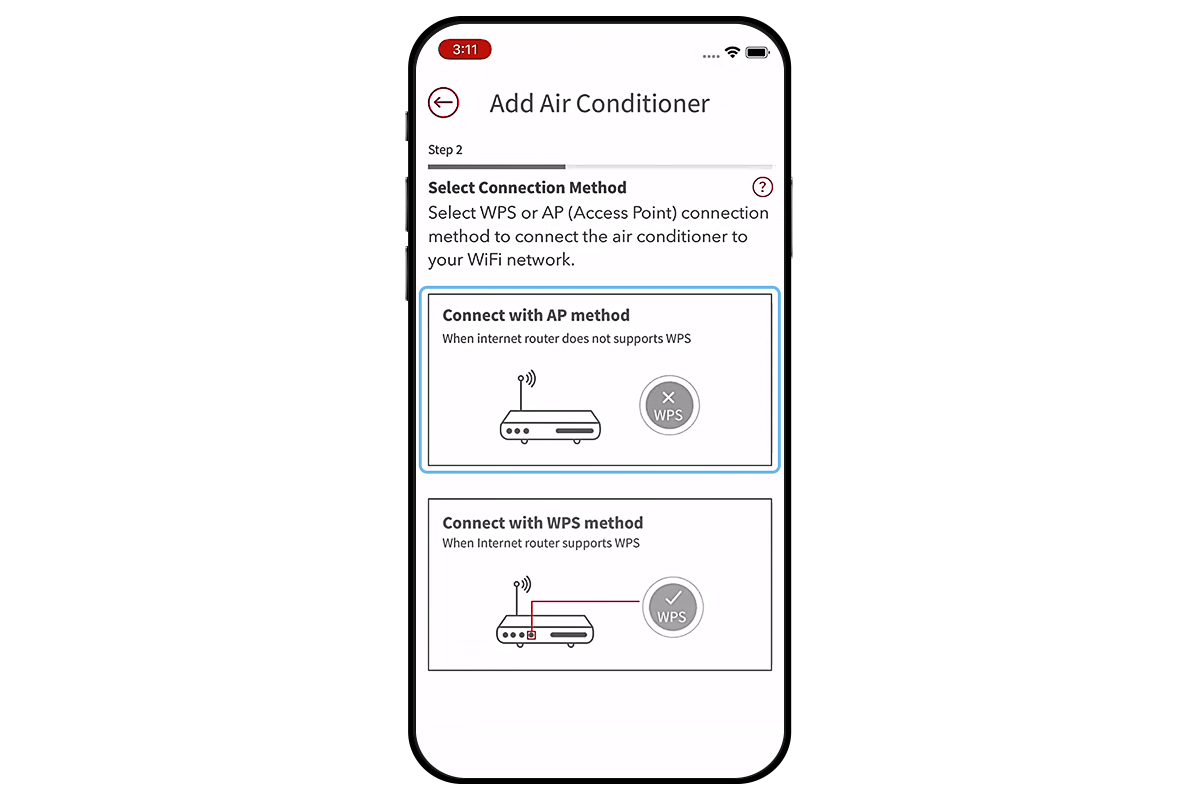
Step 3 - Select connection method
Select “Connect with AP method”
Step 4 - Confirm WiFi network
If the Wireless Network shown on the app is your home router, enter your home router password, tap “Continue”. Otherwise, select the Edit button to Change Wireless Network in your phone Settings.

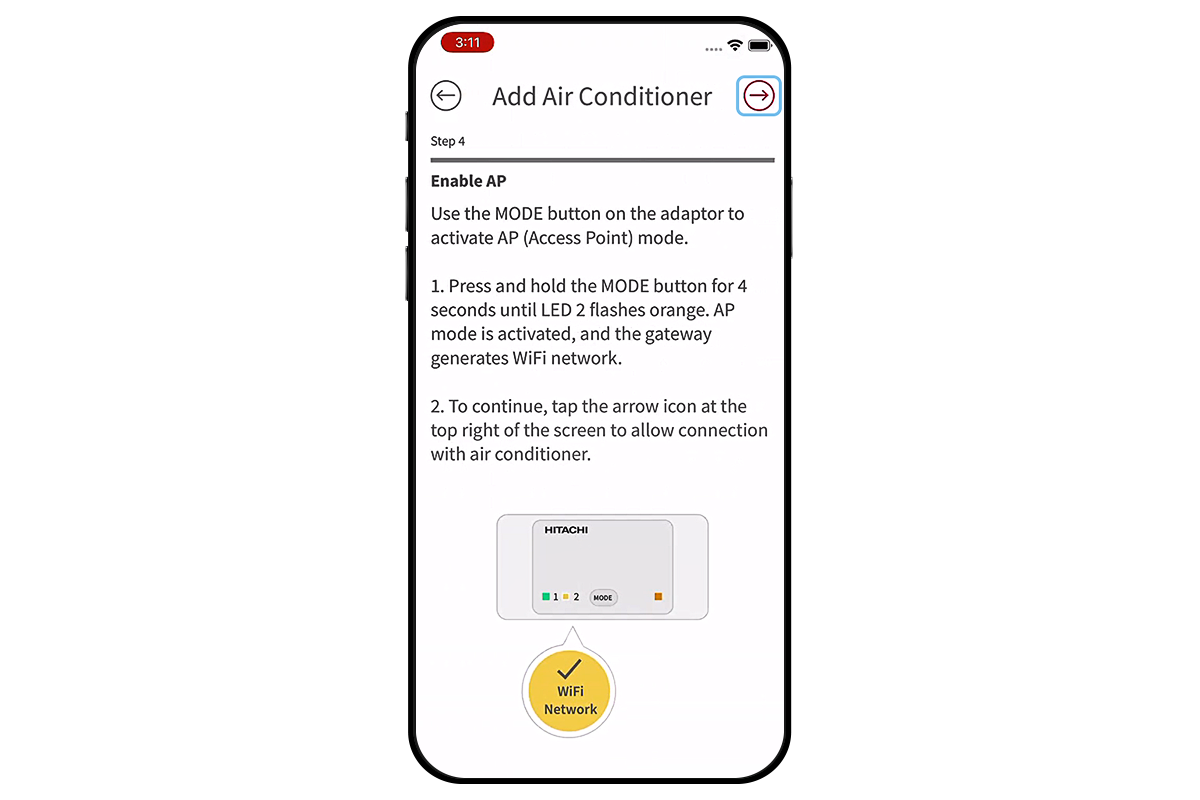
Step 5 - Connect adapter to WiFi network
Press and hold the MODE button for 4 seconds until Link LED 2 flashes. The Link LED 2 keeps flashing until communication with the Wi-Fi router is established. To continue, tap the arrow icon at the top right of the screen.
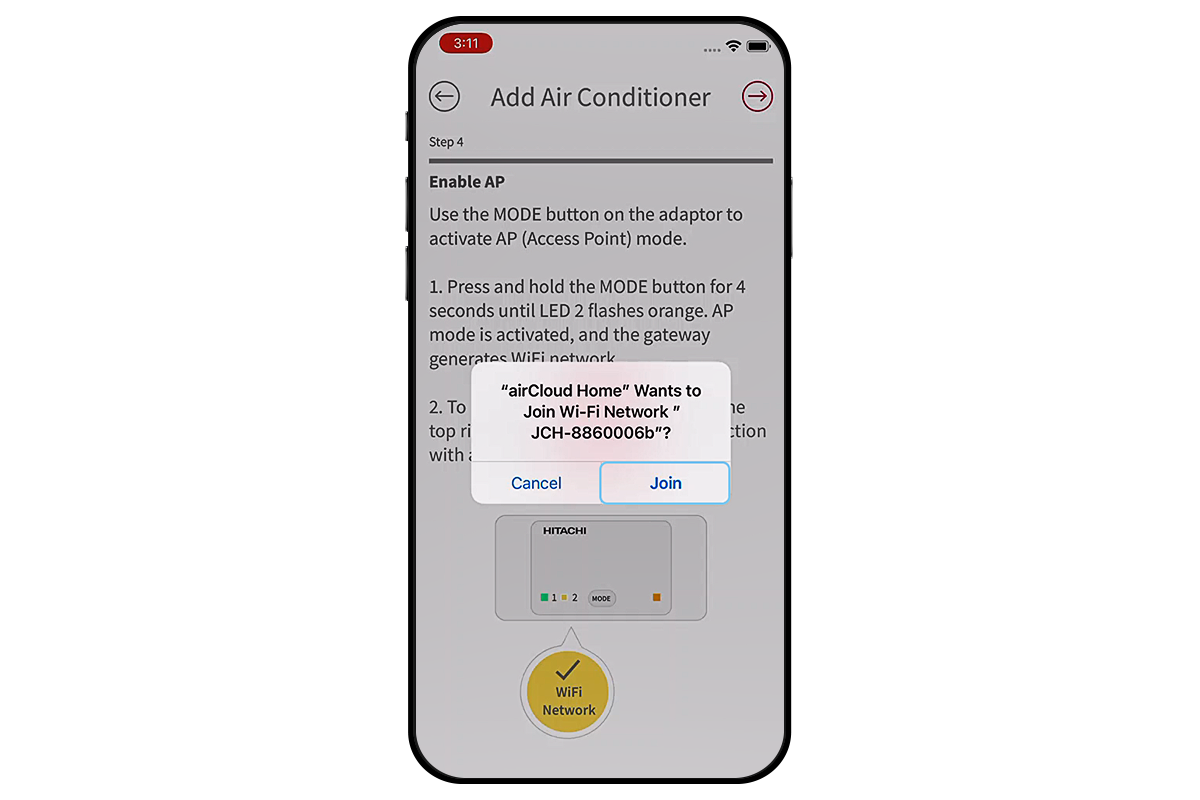
Step 6 - Connect app to WiFi network
The app will request to join the Air Conditioner’s WiFi network. Tap ‘Join’ to continue.
Step 7 - Connect AC to WiFi network
After connection with air conditioner is established, the network configuration will be pushed and air conditioner will try to connect to your home router. Once communication is established, WiFi LED on panel will be continuously ON after blinking.
After that, the airCloud Go app will reconnect to your home network.

Step 8 - Name your AC
Please assign a name to your newly registered air conditioner. You may select a name from the pre-defined list or enter another unique name.
Names that are difficult to pronounce may have limited support by Alexa and Google smart speakers.
Upon completion, tap ‘Finish’.

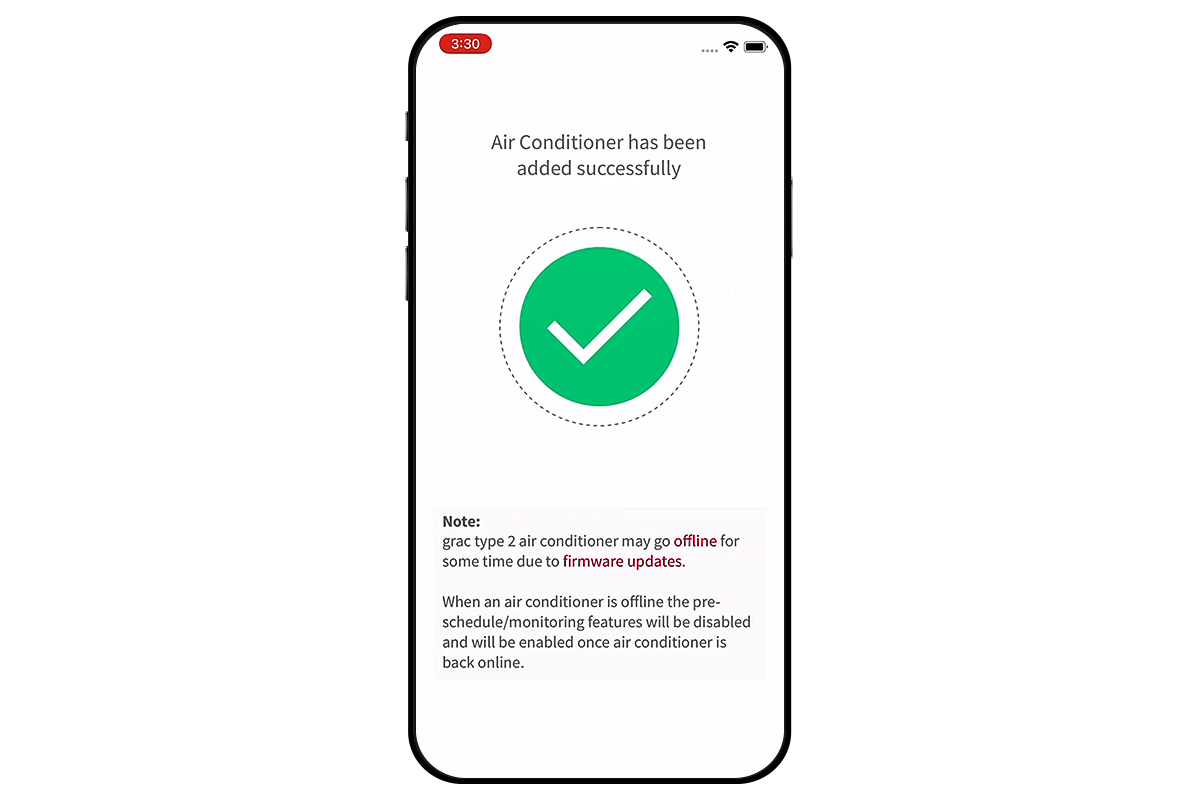
Step 9 - Set-up complete
If configuration has been successful, you will receive confirmation.
Once the air conditioner is added, the air conditioner may go offline temporarily to perform firmware updates.
FAQ test?
Lorem ipsum dolor sit amet consectetur adipiscing elit habitant faucibus, phasellus a aenean dictumst bibendum sollicitudin risus hendrerit himenaeos, auctor in primis egestas turpis malesuada nulla nam. Euismod sodales rhoncus duis eget varius aliquet penatibus interdum, curae sapien at nec quis faucibus vitae justo, cum himenaeos nibh leo semper ullamcorper id. Nulla dictum ornare et vitae himenaeos natoque semper est suspendisse fames, cras faucibus hac facilisi neque class donec potenti. Velit aliquam eu sodales faucibus convallis ridiculus netus volutpat tincidunt sed, varius quam quisque augue feugiat eget curae placerat justo, nibh a morbi lectus non gravida scelerisque sagittis arcu.
Euismod vehicula molestie pulvinar sapien bibendum habitant proin sem praesent, donec felis metus rutrum sagittis pellentesque elementum mauris curabitur risus, netus lectus litora vel integer platea aenean suspendisse. A non aptent sem pulvinar sed mauris dui, sociis iaculis ligula hac praesent arcu, ultricies class sociosqu habitant dapibus ad. Mi pharetra faucibus natoque conubia ligula luctus odio eu vel, vitae vulputate scelerisque tincidunt placerat montes enim congue rhoncus, id mauris morbi eros arcu fames est sed. Platea facilisi semper risus taciti himenaeos vel congue fames neque, ante dui lobortis a litora quam cras ut.
Can all Hitachi air conditioners connect to airCloud Go?
Not all Hitachi air conditioners can connect to airCloud Go.
Our offerings of Hitachi residential air conditioners include three types, varying per region:
- Type 1: Hitachi air conditioners requiring additional airCloud Go wifi adapter (available as an accessory)
- Type 2: Hitachi air conditioners ready to connect, with embedded wifi connectivity
- Type 3: Hitachi air conditioners that cannot be connected to an app
PRUEBA DE ESPAÑOL